In this article we’ll go over how to submit an order using the Custom Designer:
- Finding Products
- Uploading Designs
- Approve Design and Add to Cart
- Submitting Your Order
- Tracking Your Order
We highly recommend placing orders this way when you’re just getting started, as it’s the best way to get the hang of our products and to ensure that your design files are correct.
If you are placing more than 25 orders per day, contact us at support@printedmint.com to learn about our other bulk ordering options.
Finding Products
There are three ways to quickly find the product you’re looking for but first go to the Products tab at the top of the web page.
- The Search Bar
Use the search bar in the navigation menu to quickly find products. - The Shop
Browse all of our products in The Shop, where you can sort by popularity, price, and newness! - Browse by Category
Browse products by category in the navigation menu.
creating and Uploading Designs
Once you’ve found your product, simply select that product, and once on the Product page click Design to open the Printed Mint Custom Designer. Or you can also click the paintbrush tool when you hover over the product image.
In the Product Designer, you can use five different tools to help you create or upload your design.
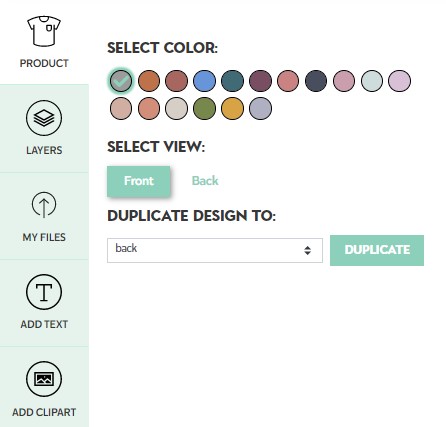
Product - This tool shows you the color variances that this product offers and whether this product can print on multiple sides. It also has the option to duplicate the design you made to another printable area on this product.
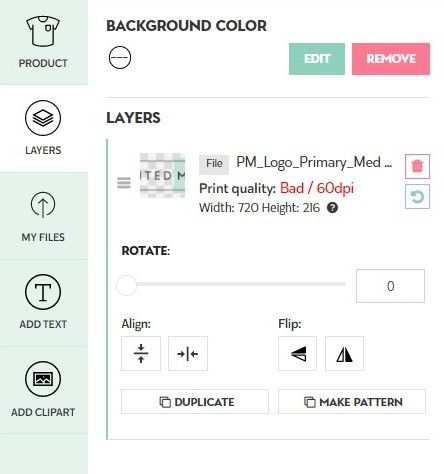
Layers - This tool allows you to see all of the designs you have placed onto this product. You can also add a background color, rotate, align, flip, duplicate and make a pattern of your design.
My Files - This is where you will be uploading your existing designs. In this tool, you will also see all the files you have uploaded and be able to search and archive these designs.

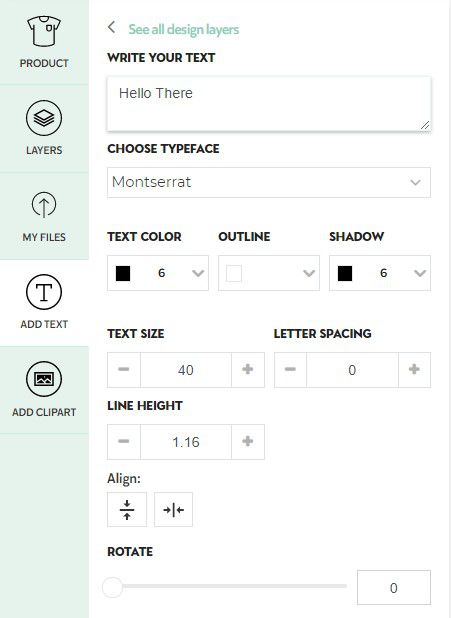
Add Text - This tool allows you to add text, change the typeface, color, and size. You'll also have more customizable options like outlines, shadows, letter spacing, line height, align and rotate.
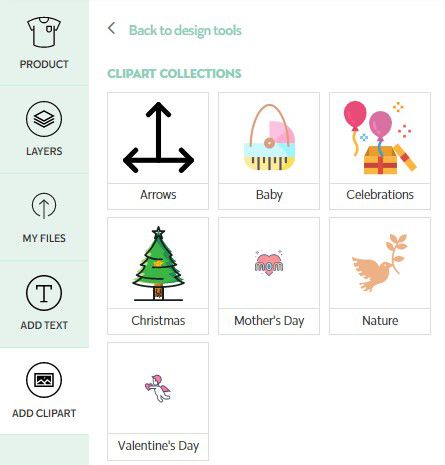
Add Clipart - This tool lets you choose from any of our numerous clipart characters and customize their colors, rotate, scale, align, flip, duplicate and make them a pattern.
Once your design has been created or uploaded in the designer hit Next at the top right corner of the Product Designer. This will take you to the Mockups of your product. From here you will select the sizes and colors you wish to use for this product then hit Save.
Product detailing, Add to cart and Save
The next page is the Product Description page. This option is completely customizable. You are given the chance to rename the product and change the description that will be displayed in your My Designs listing.
Next is the Product Pricing page. First, you must choose if you wish for this design to be saved to your My Designs or for it to be deleted after the first purchase. You will see a graph below depicting the wholesale price, the price you wish to sell it at (this is editable), and the profit you will be making from selling this one product.
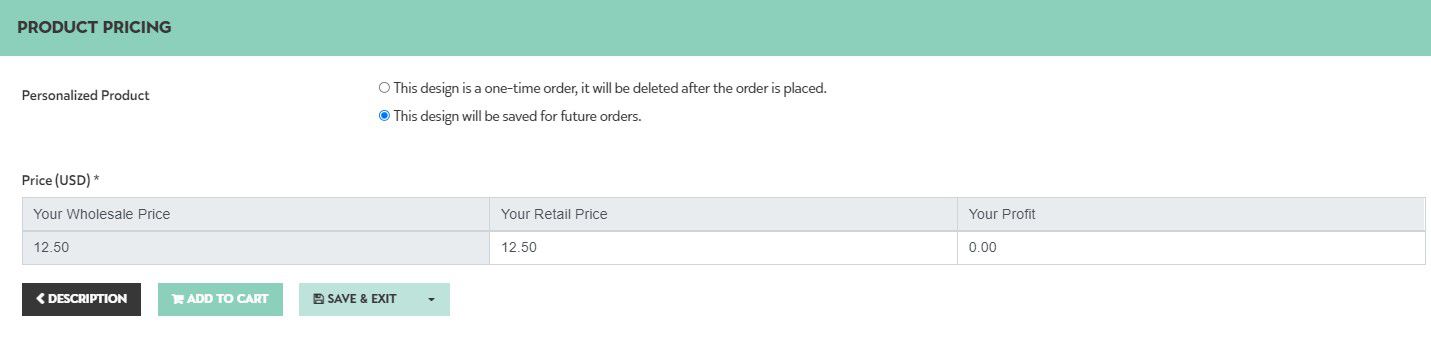
Once you choose your retail price you will have the option to Add To Cart now or to save it to your My Designs and exit the page with the Save and Exit button. There is also a third option with the drop-down menu where you can Save and Open to your new product page.
check out
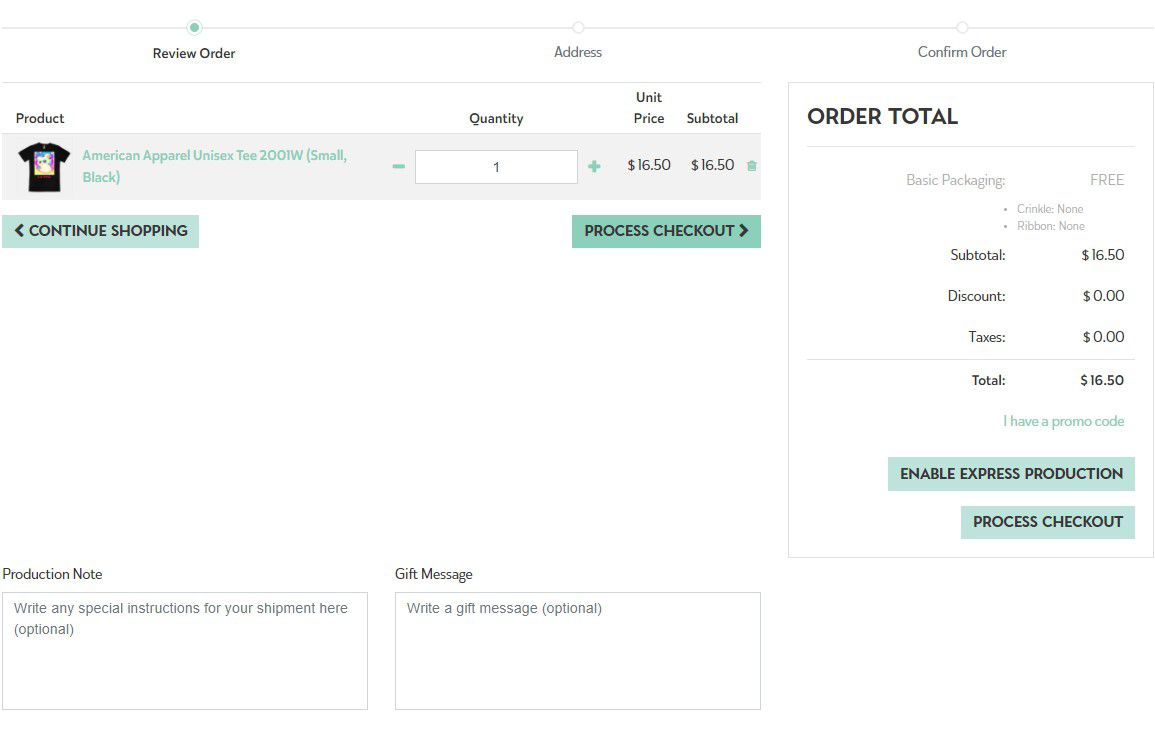
Once you’ve customized your products and added them to your cart, simply select the bag icon to view the items in your cart. Here, you can write any special instructions for your shipment in the Production Note box. Or if your customer provided you with a gift message, you can input it in the Gift Message box. On this page you can also select Enable Express Production for a quicker production time.
Once all your items are ine the cart you can Proceed to Checkout
 This page will require the Billing and Shipping Address to continue with your order. This page will also have an option to enter in a Promo Code. Once this information is filled out the next page will ask for your Delivery Method and Payment information.
Tracking Your Order
You’ll receive a notification email with a tracking number once your order has shipped, but the easiest way to keep track of your orders is in My Account > Orders.
Here, you can view your order history and see important information about your orders at a glance. You can also search for orders by Order Number , Customer Name , Tracking ID , Order Note , Date , Status and Total .
Congratulations, you’re officially a Printed Mint expert! Now enough studying, it’s time to get this show on the road!
Have more questions? Search for answers on our FAQ Page or Contact Us.
